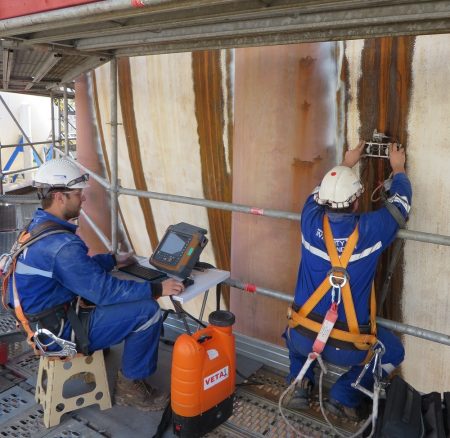
Time of Flight Diffraction (TOFD) & Phased Array Ultrasonic (PAUT) Inspection
The advantages of TOFD & Phased Array applications are well documented, however correct method selection underpins every NDT inspection requirement and is based not only on the method capability but on many variables. By combining our NDT knowledge and expertise with plant and materials experience we are confident in providing the correct solutions.
TOFD
TOFD and its principles are well documented. Utilizing diffracted energy in the detection of flaws, the technique is less reliant on flaw orientation and morphology than standard pulse echo techniques, leading to improved sizing and probability of defect detection (POD). Additionally, computerized electronic data capture and storage, in conjunction with scanning manipulators enable rapid scanning speeds to be achieved TOFD has now been accepted as an alternative to Radiography in Pre-Service Inspections with standards such as ASME, and its use in pipe weld and thick walled pressure vessel fabrication is now common place.
Due to its’ sensitivity and sizing accuracy, TOFD is also an excellent tool for in-service material and flaw monitoring. Engineers who are monitoring root erosion, stress corrosion cracking, vessel cladding, Hydrogen Attack, Weld and Steam Chest cracks for example, are all now utilizing TOFD as part of an on-going inspection regime.
Benefits of TOFD Technology
• Based on diffraction (diffracted waves), so less reliant on weld bevel angles and flaw orientation
• Rapid weld testing/screening, circumferential and axial weld scans
• Digitally recorded data with imaging
• Accurate and reliable flaw detection and flaw sizing
• Precise defect sizing capabilities and repeatability ideal for flaw monitoring
• High Probability of Detection (POD) and low False Call Rate (FCR)
• Rapid scanning as a single beam-set gives a large area of coverage
• High level of sensitivity to all flaw types
• Wide range of thicknesses 1 – 300mm
PHASED ARRAY
Phased Array Ultrasonic Inspection (PAUT) is an advanced method of ultrasonic testing, in place of single transducer beam, phased arrays utilise multiple ultrasonic element probes which are excited under computer control to generate focussed beams of ultrasound. Phased Arrays allow real-time control of three important probe parameters: focal distance, beam angle and focal spot size. As such, phased arrays offer significant technical advantages as beams can be steered, scanned, swept and focussed electronically from a fixed probe position. This control and influence of the wave front make PAUT a very versatile method for a wide variety of applications and complex geometries.
Accepted for its high probability of detection and precise measurement capability at high speeds, two- and three-dimensional views can be generated to map and identify the size and location of detected flaws.
Benefits of Phased Array Technology
• Flexibility – adaptable to a wide range of materials and applications
• Reduced inspection times, high-speed inspection using single axis scans
• Accurate and repeatable Digitally recorded data provides precise reliable and repeatable results
• Detailed visualisation – Data display in multiple formats (A, B, C and D scan), facilitating more accurate analysis and interpretation
• Precise flaw sizing and high probability of detection
• Reduced operator dependency
• Provides alternative to Radiographic imaging


