Metallurgical Analysis Services
METALLURGICAL CONDITION ASSESSMENT
Effective management is critical to ensuring safe and reliable operation up to and beyond design life. Whether you operate a generating facility, refinery, chemical plant or industrial site. When considering the in service condition of plant equipment, and in particular when working at high pressure, high temperature operational conditions, metallurgical condition assessment is an essential component to understanding current equipment conditions.
Metallurgical condition assessment performed on components that sustain in-service degradation mechanisms can provide a benchmark as to the current condition.
Field Metallurgical replication (FMR) – FMR is the initial step in the process of Metallurgical Condition Assessment (MCA). This micro-structural investigation method is a non-destructive form of testing. Used to establish cause and/or extent of damage and/or ageing mechanisms in metallic structures from micrographs of grain structure, and is often implemented alongside primary NDT activities. Metallurgical Microstructure Replicas provides important defect assessment (cause/growth) data to engineers responsible for plant management.
FMR is a process conducted by our Engineers and trained Technicians, in accordance with ASTM E 1351. Using portable equipment, the metal surface is ground and polished to a mirror finish. The polished surface is subsequently etched to reveal the microstructure. A replica of the etched surface is then made with a thin piece of acetate film. The resultant replica can then be assessed (based on VGB-S-517) either in the field using a portable optical microscope, or in the laboratory for full final assessment. This process gives our metallurgical engineers the ability to examine microstructural features such as grain size, cracks, carbides levels, creep and other damage mechanisms, and can confirm observations made by other non-destructive methods.
METALLURGICAL ANALYSIS
High quality targeted field replication is the essential first step in the process of Metallurgical Condition Assessment, enabling our Metallurgical Engineers to examine a component’s microstructure, to identify unexpected material conditions and the early stages of failure mechanisms.
A simple but targeted replication test can provide important defect assessment (cause/growth), replica analysis can provide valuable information to our Engineering team, allied with our experience and plant knowledge, from which further NDT techniques can be implemented, providing valuable data to our client engineers responsible for plant management.
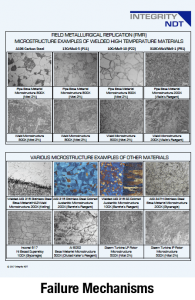
Please see in below posters sample microsturctures and sample failure mechanism images collected from our site and laboratory experience. Please communicate with us to receive high resolution posters from contact page.
HARDNESS TESTING
Hardness Testing is a commonly applied mechanical test. Hardness is a characteristic of a material and not a fundamental property, it is generally defined as a measure of a materials resistance to deformation and provides information with regard to its strength, flexibility and durability.
Principally the importance of hardness testing has to do with the relationship between hardness and other properties of a material.
As a field application hardness testing can provide leading information with regard to parent material, welding consumables and the effectiveness of applied heat treatment process(s).

POSITIVE MATERIAL ANALYSIS
Positive Material Identification (PMI) is the analysis of a metallic alloy to establish composition by reading the quantities by percentage of its constituent elements, and are typically used to analyse both parent and weld materials.
Integrity NDT provide both PMI optical emission spectrometry (OES) and X-ray fluorescence (XRF) application services.


